Ink, Press, Inspire

An Educator’s Guide to Relief Printmaking in Pre K-12

By Mrs. Shannon Fish, Lancaster High School, Ohio, 9-12 and College Credit Plus;

Mrs. Hess, St. Francis of Assisi School; Triangle, VA; PreK-8th grade Art;

Dr. Debi Bober, Cubberley TK-8, LBUSD, Long Beach, CA, TK-8 Art Specialist;

Mrs. Anderson, Hardin Valley Academy & Knoxville Museum of Art Knoxville, Tennessee; Pre-K-8

Embark on the enriching journey of integrating printmaking into educational settings with our four-part blog series, crafted by four experienced teachers who share their personal journeys and insights.

This series acts as a comprehensive guide for educators eager to explore printmaking with their students, covering the spectrum from playful experimentation in Pre-K to refined artistic expressions in high school.

Whether you’re laying the groundwork with basic techniques or inspiring excellence in every student, these posts provide a structured approach to navigating the complexities of printmaking in the classroom.

More About our Expert Contributors:

Mrs. Hess

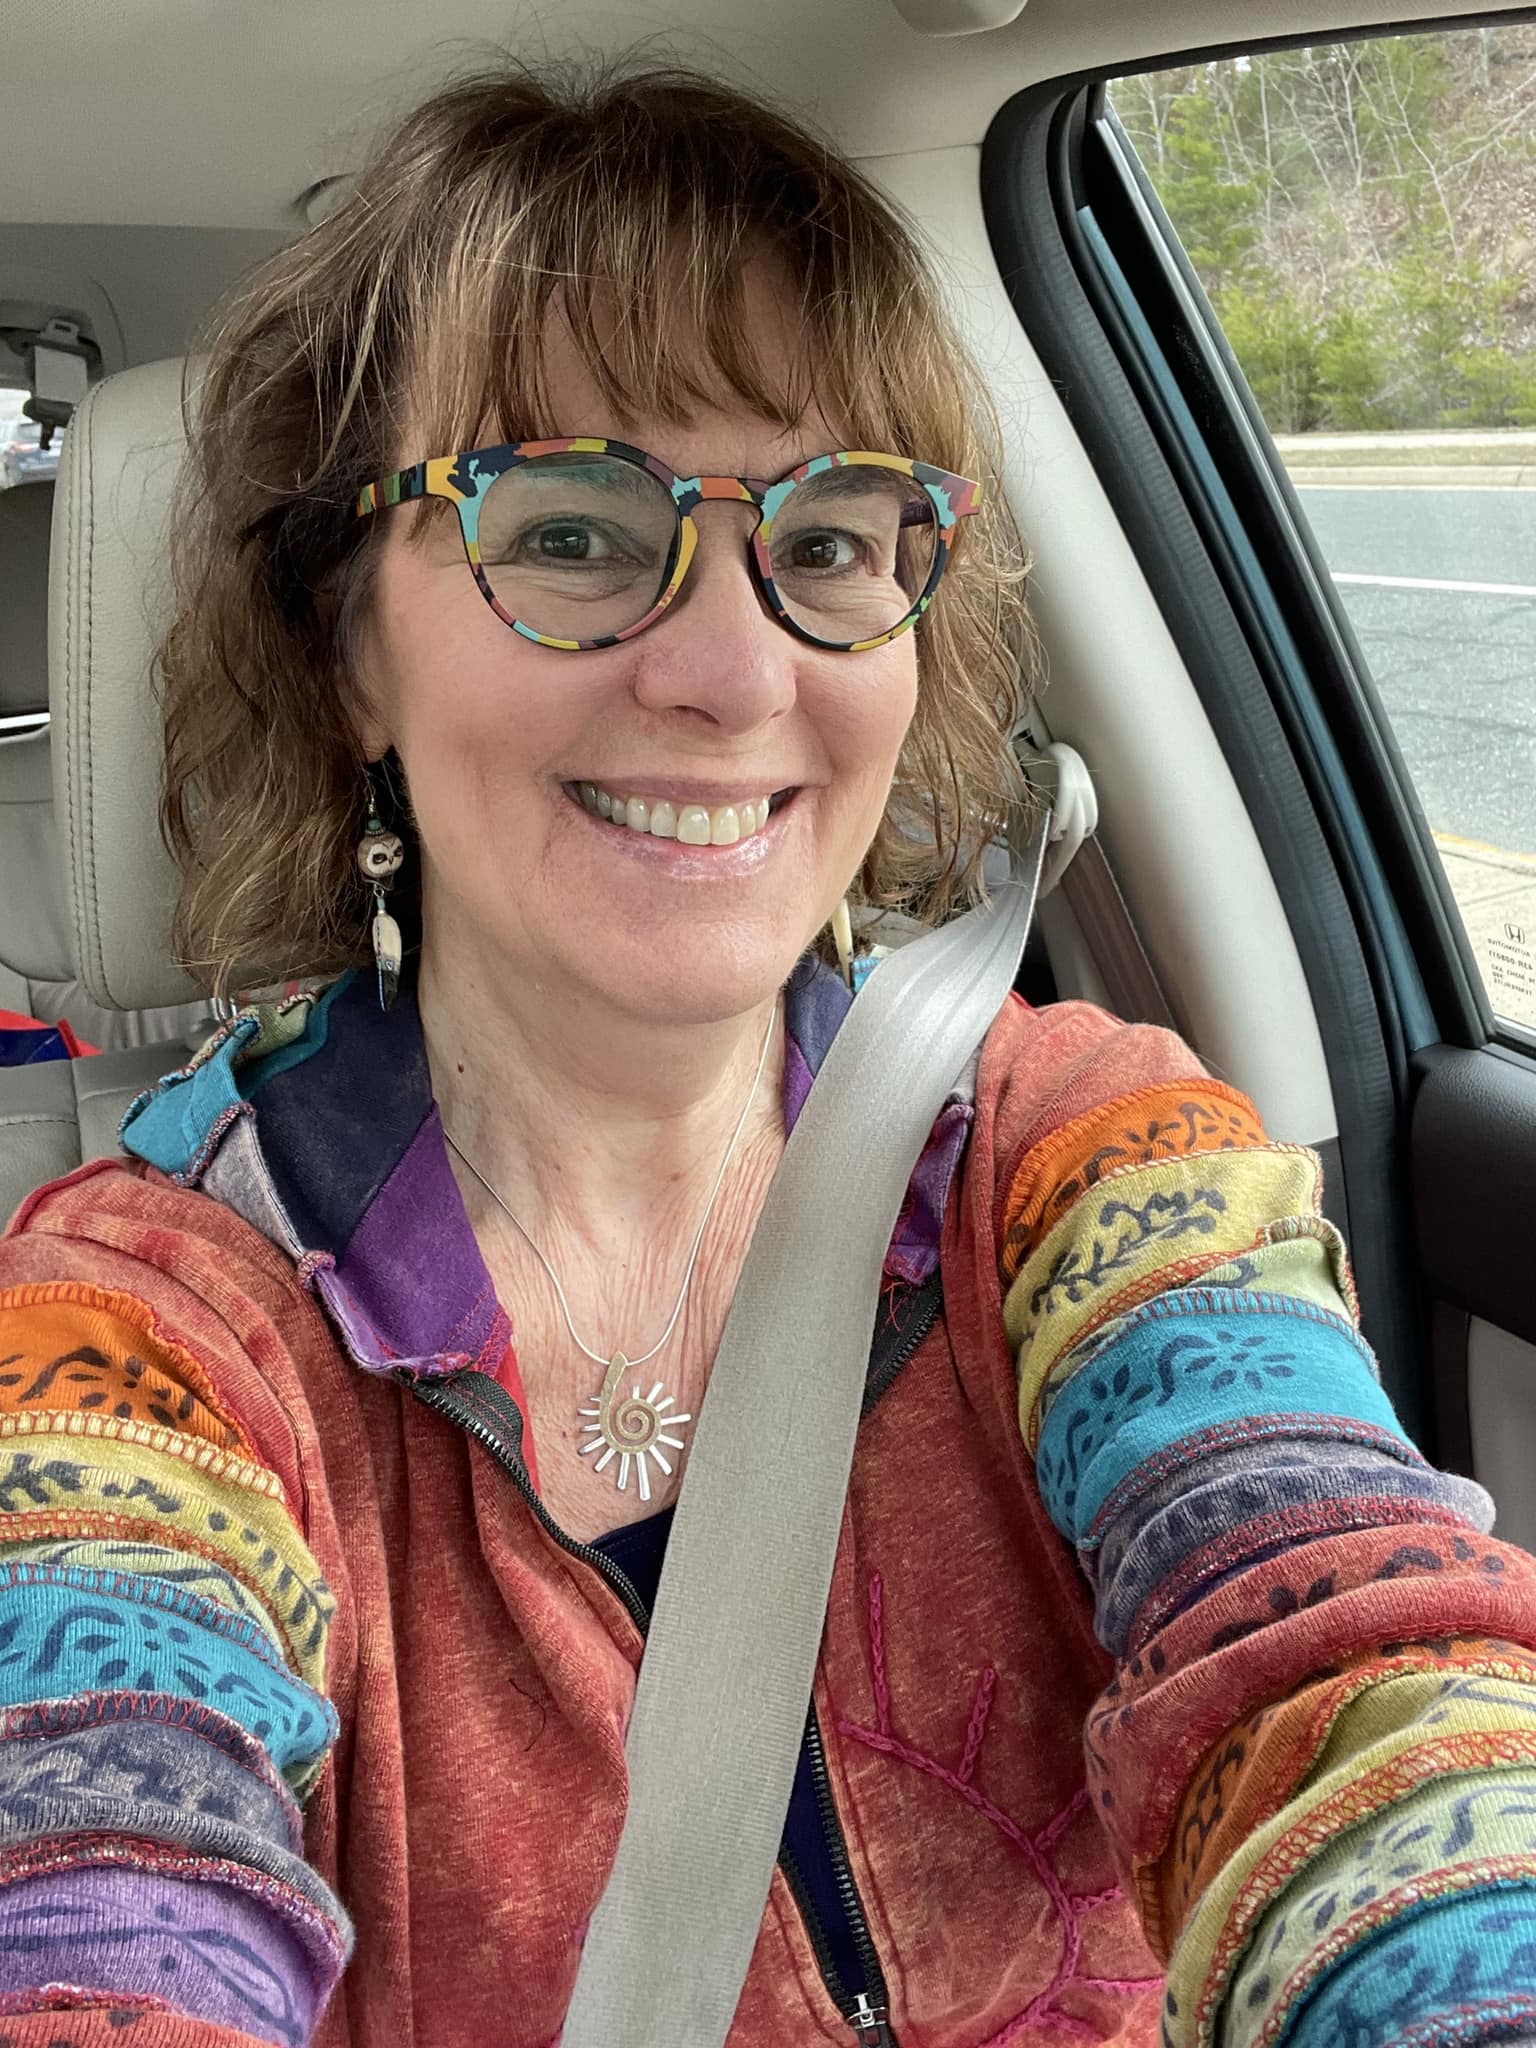
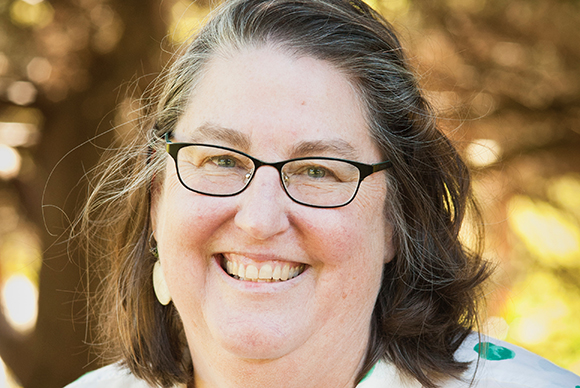
My name is Linda Hess and I have been an art teacher officially for 10 years. I fell into my job while running a polymer clay after-school program after the former teacher turned in her notice 1 week before school started (yikes!). It was amusing to think I was teaching art since my degree was in Elementary Education, but it ended up being one of the best things I have ever decided to do. I am proud to say that at age 60 I obtained my Master’s degree in Art Education (thank you Art of Education University). Everyone assumed that I had an Arts degree, so I thought it high time to actually get one. I teach PreK-8th grades in a Catholic school in Triangle, Virginia.

My favorite “mantra” to the students is “There are no mistakes in art, only happy accidents” (thank you, Bob Ross) as well as “Your way of creating is the best way. It is YOUR artpiece.” Of course, this has come back to bite me a time or two when my students remind me when redirected, “But Mrs. Hess…”

I have been married for almost 36 years to my high school honey. We have 3 grown children and 2 twin grandbabies (15 months),who thankfully live close enough for a baby fix every couple of weeks.

Mrs. Shannon Fish

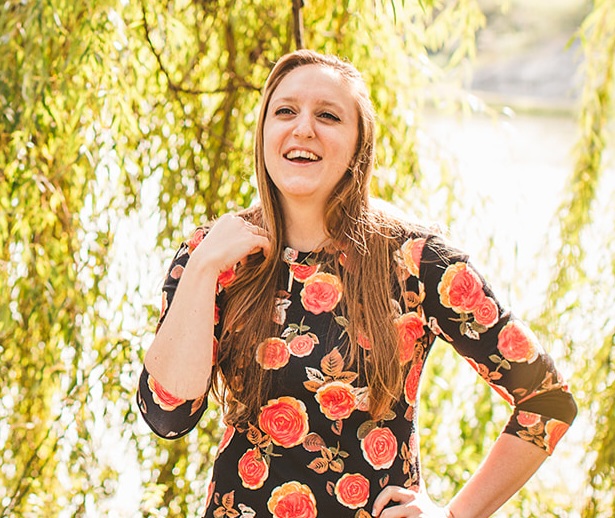
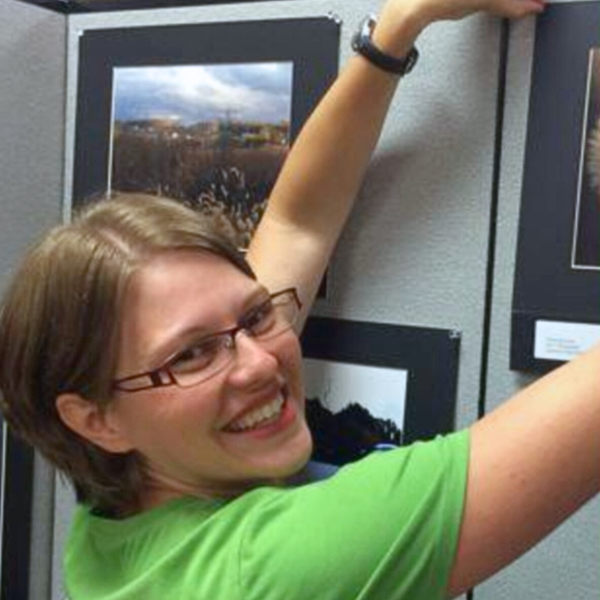
Hello, fellow Art-involved readers! I’m Shannon Fish, a high school Visual Arts Instructor from Central Ohio, with 20 years of formal public school teaching experience, but nearing 30 years of involvement with teaching in various settings. Prior to being a first year teacher, I made exactly one linoleum print. Ever. One! Initially, I started teaching middle school and was introduced to the idea of printing with styrofoam blocks, and explored with my seventh grade students.

When I arrived at the high school level the concept of teaching printmaking was daunting, and honestly I intended to skip it, until my colleague, Suzy Rogers, taught me the magic of pulling a print! I tell this for two reasons, first to give credit where credit is due, but also to illustrate that anyone can use this exciting medium to expand the horizons of their students—just give it a try! You’re here reading this blog post, so you’re already well on the way!

“Inspire, Create, Play!,” is my teaching philosophy in three words. The environment and rapport in my classroom serves as a safe space to inspire students’ creative process. These elements are imperative to consider with equal care and enthusiasm as the content delivered. Once we build trust and mutual respect, students are free to create and play with Art concepts and materials for self-expression. Teaching students first as humans, then as learners enables the full benefit of information presented, and a better understanding of the implications to college, career, and life. One of my proudest teacher moments: One of my, now graduated, Art students missed 94 days of school her freshman year. After becoming more involved in Art class as a sophomore, she missed nine days of school. When asked by an administrator how she made such a dramatic improvement, she responded, “Because I need to be in Art class.” Be the reason kids come to school!
Dr. Debi Bober

This has been the best year of my career!  When Proposition 28, the Arts and Music in School Initiative, passed in California in 2022, my school district jumped on hiring new art teachers to fill our elementary schools.  I had been teaching for 29 years, and have taught each grade from Kindergarten through eighth grade during my career, so when the opportunity to teach art to ALL grades at my K-8 school came about, I was ecstatic.  The arts have always been my passion, from my start at Orange County High School of the Arts, Idyllwild Arts Academy, and then Chapman University for music.  I dabbled in various art and music classes through high school and college, not knowing exactly what direction my life would take me.  I came to the realization that, as a teacher, I could share my passion for art and music with thousands of students.  Over my career, I’ve realized the value of visualizing when thinking, presenting ideas creatively, and translating learning into songs, dances, raps, and artwork.  I use chants, hand movements, music, and digitally animated visuals during instruction because when multiple modes of learning are accessed simultaneously, student learning occurs more deeply. This focus on effective teaching has brought me many achievements, including the dissertation award at UCLA for my research in interactive instruction in high poverty classrooms.  In 2019, I was awarded Los Angeles County Teacher of the Year and a finalist in California Teacher of the Year, out of 180,000 teachers.  Now, in my thirtieth year of teaching and thanks to funding from Prop 28, I am the new art teacher at Cubberley TK-8 in Long Beach, California.

Mrs. Anderson

My name is Donna Anderson. I’m the author of Experience Printmaking, a textbook which is part of the Studio Series from Davis Publications. I taught Visual Art in  Knoxville, Tennessee for 40 years and am now retired. Presently, I am working on the second edition of my book which will also be published in a digital format. Although retired, I taught and still teach at the Knoxville Museum of Art’s Summer Art Academy. Funnily enough, in my last year teaching high school before I retired, there were eight seniors in my Printmaking class who had art camp with me as a five-year-old! Although they weren’t planning to go into art-related majors in college, they still loved art and continued to learn new techniques and produce artwork. Isn’t this what you want?

Mindfulness in the Classroom

Mindfulness has an immeasurable positive impact on our well-being. How can we weave in mindfulness to best benefit our students?
By Sarah Nussdorfer

Mindfulness is a word that has gained popularity in recent years, and it can often seem like just one more thing to do. However, mindfulness practices support our students and their emotional regulation and benefit us, too. It can be used in all classrooms, regardless of subject or age group. Mindfulness improves focus and concentration, supports emotional regulation, and supports healthy, growth mindsets.

Through my training at Breathe for Change, I learned many techniques I have implemented in my kindergarten classroom, in my Community Education yoga and mindfulness courses, and with multi-age groups I see after school. The rewards have been immeasurable.

Parents have reported how students use our techniques at home, and I see students using our breathing exercises to regulate their emotions independently by the end of the year. In addition, when students do become dysregulated in our classroom, which happens, they can ask for help in the way they need it clearly.

3 Strategies to Promote Mindfulness in the Classroom

Strategy 1: Chime Time

One of my “go-to” techniques is *Chime Time*. I use this simple, yet highly-effective strategy to get students focused on learning and in transitions. It grounds us all and supports our full engagement with the present moment in class.

For the strategy, you would need a chime or bell.

  1. Invite students to sit or stand; their eyes may be open or closed.
  2. Ring the bell or chime
  3. Have the students sit very quietly until the sound can no longer be heard.
  4. When students believe the sound is done, they’ve been instructed to make a hand signal (be sure to review school-appropriate hand signals), such as a peace sign.

I repeat 2-3 times and invite students to ring the chime. Students love ringing the chime, and it becomes one of the best ways to get their attention and bring down their energy level.

Strategy 2: Creative Expression

Creative expression is a critical component in the Breathe for Change SEL*F Components, and supports students in expressing themselves differently. I use this as a stress reducer and as a calming technique during our quiet time in my class. It supports self expression and creates ways to connect as a community. It is also a big stress reducer before assessments and big projects.

2nd grade student’s first draft of her outdoor scene

In my classroom, we set both personal and collective class goals. When we plan our goals, the students get to choose our reward if we meet the objectives. For example, one of our early goals is to know all of our letters and their sounds. As we set this goal, we also will set a reward for when we meet our goal. When choosing a reward, I have found many students enjoy doing art, painting, and crafts. I allow for creative expression and individualism, and students can make their creations their own. Many students will create paintings using their hands to make an alligator or a jellyfish. Others may want to create beaded friendship bracelets to share with others in the class or school. When it comes to creative expression, it is best to have lots of options!

During this time, I weave in choices for different expressions—-such as creating using paints, play dough, painting with q tips or sponges, an creating with construction paper, scissors, markers, and glue. Or perhaps students may want to create a poem or song to express themselves. Students get to show their creativity and their passions. We also discuss how students can use this type of expression at home or when they may feel stressed or need a break. I teach students art expression with everyday objects (like Q-tips.) Using everyday objects make the expression more accessible for all families.


Throughout the creation process, we will have 2-3 times of painting, drawing, or creating, so that students can add more depth to the paintings and ensure it is portraying the message or beauty that the student wants. Having these “draft sessions” is crucial because just as we edit writing before publishing it, creating art also requires us to go back in and edit to ensure it expresses what the student is trying to convey.

Students will be given a theme such as an outdoor scene or under the sea if they struggle to decide how they want to create or express that day. Some students need a jumping off point, while others have ideas for days on what and how they want to make. I respect and encourage all types of expression as long as it communicates something important to the student.

Strategy 3: Flower Breath

Another everyday technique that has become valuable in our class is the Flower Breath from Breathe for Change. I use the Flower Breath during transition times to help slow everyone down and get us focused on a new activity, such as reading or math whole group instruction. It is very helpful and focuses us on learning. The Flower Breath is also a game changer during times when students are significantly dysregulated and need to calm down their nervous system. My students will even do this when they are upset on their own once we learn it enough for it to become natural for them.

To do a Flower Breath:

  1. Students put their hands together with their pinkies and thumbs touching, closed like a flower.
  2. As they breathe in, they lift their flowers and open their fingers while keeping their pinkies and thumbs touching.
  3. As students breath out, they will close their flowers again in front of their hearts.
  4. You will continue this breathing with opening flowers up on inhale and closing flowers down on exhale.
  5. Repeat as many times as you would like. (I do 3-5).

We repeat this breathing technique often; once students learn it, it is one of their favorites.


Above: Flower Breath from Breathe for Change

Sarah Nussdorfer

Sarah Nussdorfer is a yogi, educator, and literacy expert who teaches Kindergarten in Dearborn, Michigan. Sarah is interested in Educational Leadership and has led the Mindfulness Club program at her school. She teaches community yoga classes for adults and children. Sarah has received her 200 hr yoga teacher and SEL*F (Social Emotional Facilitator) training from the Breathe for Change program and has a Master of Arts in Educational Leadership from Saint Leo University.

As a survivor, Sarah’s passions include bringing breathwork, mindfulness, and meditation to students and teachers to support trauma healing and trauma-informed practices. Sarah believes that every student matters and should believe in his/her/their uniqueness and worth. Sarah helps students develop strong, positive self-images rooted in confidence and staying grounded.

Sarah is also the founder of Live, Love, Learn—a Mindful Education Consulting company. Her mission is to support all education stakeholders, especially the students and teachers, one breath at a time.

A Practical Guide to Earth Art at School

Here are some ideas to get you started on interweaving science and art in your schoolyard.

By Eleva Potter

I love interweaving art and natural materials, especially when I can get kids outside to explore an interdisciplinary lesson with science and art. Earth Art, for example, provides the perfect platform to meld the two.

I am a former high school teacher; I currently work as both an environmental educator and an art educator, and I work with kids ranging in age from Kindergarten to High School. I approach Earth Art slightly differently depending on the age I am teaching.

Younger Elementary:

For younger students, I often focus on the work of Andy Goldsworthy to introduce Earth Art. Andy Goldsworthy is an artist who repurposes found materials to create transitory outdoor works of art.

For example, this piece is a line in a field made of shedding from sheep that he collected from other nearby fields.

I use his art to launch conversations around the color, shape and texture of everyday items we can find outside, such as leaves, rocks, pine cones, flowers, etc. Students can be asked to look for different colors, textures, and shapes like a scavenger hunt and can also create pieces that are gradients of just one color or shape.

After exploring natural materials outside, I give each student the opportunity to work alone and in groups to make their own “Earth Art”.

They present their final piece to the rest of the class through an outdoor gallery walk. When I don’t have access to an outdoor space, I adapt this project by simply bringing the natural items inside for students to explore.

Upper Elementary & Middle School:

For older students, I like to focus on larger landscape artists like Patrick Dougherty and talk about their specific local ecosystems.

Patrick Dougherty is best known for his sculptures and installations built with sticks and saplings.

I use his work to cover invasive species identification. Students will need to harvest many plants to complete one of two project ideas, and knowing invasive species allow them to do so without affecting the health of the local ecosystem.

Once students have collected a large assortment of invasive plants, I typically have them do one of the following two things:

  1. Blend the plants to make homemade paper
  2. Weave the plants into Earth Looms

I’ve included the step-by-step process below for teachers interested in trying these projects with their own students. 

Project Intructions:

Invasive Species Paper:

  1. Blend soft invasive plants like Garlic Mustard with other fibers like paper or dryer lint and ample water.
  2. Spread out on screens as thinly as possible and allow to dry overnight. 

Experiment with different invasive species to make a variety of colors. 

Earth Looms:

  1. To create looms in a grove of trees, start by tying large sticks to two close trees for the frame of your loom.
  2. Use string or twine to tie together sticks every inch or two for the warp.
  3. Weave the invasive plants between the pieces of string like weft.

You can add color and detail with flowers, pine cones, and even animal bones you may find!

Outdoor art is a very engaging way to introduce STEAM lessons and get students moving.

With any outdoor lesson, a little preparation goes a long way. Before you begin, I recommend scoping out your schoolyard first to look for common invasive species. Then decide where would be a nice open space to display the art and identify any hazards you could run into. In particular, be mindful of harmful plants like poison ivy and know when it is tick season. Remember, the earth without art is just — eh!

Eleva Potter

Eleva Potter has been an outdoor and environmental educator for over 10 years and has a Master of Environmental Education from the University of Minnesota – Duluth. She is passionate about interweaving art and nature, and growing students’ connection to their place.

Connecting Art Lessons With Student’s Experiences and Stories


Most of the artists I know work from their own experiences. How can teachers connect their art lessons to the experiences and stories their students bring with them into their classrooms?

By Mark LaRiviere, Children’s Arts Guild

Some of the greatest gifts teachers can give to their students are to create lessons that let students explore their experiences and the personal stories that they carry with them in life. When children know that their experiences and stories are valued by the adults in their world, and that they can create with them, they will carry that belief within themselves throughout their lives.

A self-portrait done by an 8th grade student.

Years ago when I was teaching art in the Bronx, a second grade student named Allison asked me during class, “Why do we always make art about what you want to make, could we make art about what we want to make?” It was a precocious question from such a young child, but it got me thinking. “How could I redesign my curriculum to still teach the concepts, skills and materials that the students need to learn and also let them express from their own personal experiences?”

My solution was to develop a series of open-ended questions that I would pose to the students for each art lesson. Questions such as, “What do you like to do alone?” “What do you like to do with your family or friends?” “What is something you are good at?” “What makes you laugh?”, etc? With help from my students, we developed a year’s worth of questions for the curriculum. At the beginning of each lesson a new question would be posed as the starting point of our work. I was able to teach the concepts, skills and materials I needed to teach yet give the students the power to create artwork that was personal and meaningful to them. By giving the children open ended questions that they can answer personally, these questions become the subject of their work. The art that the students produce is much more varied and lively. For example, in teaching students to draw a human figure, a figure in motion or a face or head,  letting them choose a person they have a friendship with or a family member lets them add details that helped them develop and create work that was personal and meaningful to them. We still teach with the materials and visual concepts we introduce to our students, yet by giving them ownership of the subject matter, we can assist them in developing their expressive skills that they are choosing.

As art teachers, we are asked to teach our students many skills that will give them the abilities to further their expressions in the visual arts. We teach these important skills throughout the developmental stages in our students’ lives, from mixing primary colors in their early years to complex composition and material explorations as they get older. While these skills are very important and need to be taught, the underlying reasons students learn the visual arts is to give them a means of expressing themselves and understanding how all cultures have communicated through visual elements.

As we introduce and teach these skills to our students, I have found that the most successful art teachers design lessons where their students begin with the idea that they will be telling their own stories. The art they will make, and all of the learning that will be happening in the class, is in service of each student finding the best tools, techniques, concepts and skills to get their personal ideas across in the visual medium we are learning.

A self-portrait done by a 6th grade student with objects found around the house.

A self-portrait done by an 8th grade depicting their anxiety.

 One of the gifts many teachers learned during the pandemic when students were learning from home, was that they began to create art that was very personal to them out of necessity. While some of the students had access to art materials, others needed to make do with rudimentary art tools; for some students, ballpoint pens on lined paper were all that was available to them. Much of the artwork that the students showed their teachers was personal and very expressive. The students were telling stories about their lives with whatever materials they could find.

Many of the teachers had to scrap their plans and began to ask the students to create art that allowed them to express what was happening in their world as we were all shut down and working from home.

Now that schools are back in session, we can continue to learn from what our students showed us during lockdown. They can create personal and expressive artworks very creatively and we can continue to teach them the skills and further their understanding of the visual tools we offer through our classes.

Mark LaRiviere 

Mark LaRiviere is an artist and educator teaching children and adults to discover their personal creativity through the visual arts, music, and a host of activities that bring us closer to expressing our true natures.  Mark is a co-founder of the Children’s Arts Guild, he founded Creative Classrooms, works with Studio in a School Association and has taught education students at Manhattan College in NYC.

Mark believes that all children should know that they are valuable human beings and that their experiences and interests are valuable and are the basis of engaging them in their education.

Mark is also a working sculptor showing at galleries and museums across the country.

Creative Ambiguity

In learning, ambiguity is where the thinking, learning, & creativity, takes place.

By Dana Squires, a teaching artist in Washington State. 

Music is the space between the notes.”

– Claude Debussy

(Birds on a Wire Pierre St John)

The Importance of Ambiguity:

In visual artwork the “empty” space between the primary shapes is called negative space. But this space is actually not at all negative and is the all-important framework for the entire piece. In learning, also, the empty space, or, ambiguity, is where the thinking, the real learning, the creativity, takes place.

I try to include a healthy dose of ambiguity into each and every project.

Ambiguity means having no preconceived “right answer” or set outcome. This means that there is no one way to proceed. When you intentionally include ambiguity in a lesson, there is space for the student not only to find their own answer in their own way but to define the question being asked. Ambiguity forces one to look at things from multiple perspectives and encourages critical thinking.

For many, ambiguity is uncomfortable, even scary. Students can be afraid of not knowing what is expected, doing something wrong or making a mistake. Learning to navigate ambiguity and practice doing so is an important part of learning to learn. Not knowing can be an invitation for creative problem-solving,

Image: Students in Squires’ class creating visual narratives from simple shapes

How to Include Ambiguity:

Providing a safe place to explore is the first step. As students gain practice with ambiguity, they become more comfortable recognizing, and valuing, the process of not-knowing. As they move through it, they begin to recognize and value their own instincts and unique point of view. You can find simple opportunities to help students build this confidence by having them navigate and define situations for themselves.
For example, dividing a class into groups? Instead of numbering off, ask the students to divide themselves into three groups by clothing color and allow them to collectively define what that means. They’ll have to decide on both the questions and the answers, such as…”What three colors?” …”Does the blue and yellow striped shirt go to the blue group?” Maybe – or maybe the students decide to have a multicolored or patterned group.

Exercises like these have clear outlines (divide into three groups) but provide freedom for interpretation within those borders (no defined groups.) Students are given the license to interpret the situation in their own unique way and choose how to respond.

In upper elementary classrooms I take students for a walk around campus to collect 8-10 items (leaves, twigs, rocks…).

Back in the classroom, I ask each student to put their items in order. I let them decide what is meant by “order” without giving examples. The first response is usually the most obvious, and everything is in line by size.

The class discusses the choices they made. But ask students to put the objects in another order, and may things get more interesting. Things are often ordered by type (e.g. leaves, then rocks), color or shape.

Ask for a third order. Here students begin to get more creative. Things are put in alphabetical order or by “sharpness” or other unique categories emerge.

The point is there are many “orders” in which the objects can be arranged. All of the solutions are “correct.” The students have fun trying to think of creative new orders. I like to document the different groupings in photos for the wall, validating that all solutions were equally valid.

Exercises like these give students practice feeling more confident navigating ambiguous situations. They gain confidence in taking small risks and are prepared to take larger risks in the future.

Students go from “What SHOULD I do?” to “What are the possibilities?”

That is what ambiguity does. It allows possibilities.

Dana Squires

Dana Squires has 20 years of experience as an arts integration specialist and teaching artist in Washington State, USA. She has taught in schools at all levels, teaching art, doing collaborative arts integration work, and teacher training. She has worked with refugee organizations, with learners of English as a Second Language, and lived and worked at the village level in both West Africa and Melanesia. Dana studied Making Thinking Visible concepts through The Graduate School of Education at Harvard University.

Empathy Through Art Education: A Pilot Investigation

A recent pilot investigation shows promising insights into the relationship between art education and empathy development.

By Emily Hardy, a nationally board certified art therapist, LCAT, ATR-BC


This is Part II of a series diving into how Art & Empathy intersect. If you missed Part I – The Intersection of Art Education and Art Therapy- you can find it here.

Introduction: Empathy, Neuroscience, and Development

Empathy is a cornerstone of healthy, functioning adults, and healthy, functioning societies. It allows us to understand ourselves, others, the world, and our place in it. In fact, empathy is seemingly hardwired into our very nervous systems. Mirror neurons allow us to experience the embodied, affective states of others, meaning that when you observe someone in distress, your own nervous system is activated to likewise feel distressed. It’s a survival mechanism that helps humans share vital survival information nonverbally.


Empathy is of growing interest to the field of developmental psychology. Studies show that empathy is relatively low in infancy and early childhood, but begins to emerge around the time that abstract thinking skills begin developing, and then continues to grow during adolescence. Therefore, educators are particularly poised to assist young students in their empathy development.

Art education is exceptionally suited to this task, because the embodied experience of artistic creation can harness the power of mirror neurons. That is, engaging in nonverbal creative tasks can help access the nonverbal pathways our nervous systems. This is what helps us feel a particular feeling when we see an artwork, and we can also share feeling states in this way through the process of creating artwork. Furthermore, exploration during artistic projects helps youth explore their identities, their inter- and intrapersonal roles and experiences.

The Study:

The study consisted of three parts: first, it collected basic demographic information; second, questions used to calculate how many art lessons students received in an academic year; and finally, observations of students’ prosocial and antisocial behaviors.

The combination of prosocial and antisocial behaviors together were used to measure students’ empathy levels. Prosocial behaviors include offering to help others, and verbalizing support for peers. Conversely, antisocial behaviors are things like stealing, lying, or appearing to enjoy seeing a peer in distress.

Statistical analyses compared each class’s prosocial scores to the number of art lessons they received. The same analysis was run for antisocial scores and number of art lessons. Finally, a third statistical analysis was run as a sensitivity analysis between prosocial scores and art education after some of the outlying data points were removed.

The Results:

The results showed a moderately positive correlation between students’ prosocial behaviors and how much art education they received, as well as a mildly negative correlation between their antisocial scores and their art education. This means that students who received more art lessons, also tended to show more prosocial and less antisocial behaviors. Additionally, the sensitivity analysis showed a strong positive correlation between prosocial behaviors and art education.

Interesting Insights:

Several interesting qualitative observations were also collected. In the survey, teachers were asked for both positive and negative experiences with implementing art education. Four positive themes, and three negative themes were identified from the answers. First the positive:

  1. Art lessons support learning in other subjects
  2. Art lessons support positive social engagement, such as helping others or improved social skills
  3. Art lessons support aspects of students’ personal self-growth, including creativity and self-esteem
  4. Teaching art lessons is a positive experience for the educator

The negative themes included:

  1. Challenges engaging students in art lessons, including language barriers, student behavioral issues, or student disabilities
  2. Logistical challenges, including keeping the environment clean, or not having enough time to give an art lesson
  3. Organizational challenges, such as lack of funding, or lack of administrative support

What It All Means:

This pilot investigation was highly promising, but would benefit from repeated tests in order to better validate the findings. Educators showed through their responses that art education is valuable to their students’ empathy development. In fact, 94.4% of respondents attested that art education is important to their students. In a nutshell, this all means that art education plays a fundamental role in socioemotional learning, particularly empathy growth. The exciting findings of this pilot study show that further investigation and research on art education, the creative process, and its role in socioemotional development is merited. A better understanding of how all these things relate will help educators and other professionals to provide powerful support and guidance for youth.

Emily Hardy

Emily Hardy is a nationally board certified art therapist and licensed as a creative arts psychotherapist in the state of New York. In her role as an art therapist, she has worked with incarcerated adolescents, at-risk youth, and people of all ages with mental health concerns such as anxiety, depression, hyperactivity, and more. For more information, consultation, or referral for art therapy, please reach out.

Empowering Students through Heroism

The Heroic Imagination Project (HIP) is a nonprofit with the mission to promote heroic action through the combination of psychological research, intervention education, and social activism.

By Zoë Huml, HIP Board Member and HIP Hero Club Founder

How can we raise young students to recognize the impact of their actions?

How can we empower youth with the confidence to spark positive change?

At the Heroic Imagination Project (HIP), we believe that teaching heroism is a powerful answer.

Download a free copy of Doodles Academy’s

Heroes Among Us‘.

Use code HIP at checkout

Wonder Woman. Batman. Spiderman. While students often grow up thinking of heroes as characters who wear capes and have superhuman powers, HIP works to broaden the definition of hero so it is more accessible.

At HIP, our aim is to show that heroes are really ordinary people who engage in extraordinary behaviors. In the context of school, a hero is someone who speaks up when someone says a mean joke, despite risking social exclusion, or someone who puts themselves out there to solve an issue in their community. Being a hero isn’t an extraordinary power that someone is born with: being a hero is a choice.

“No one is too small to make a difference”

– Greta Thunberg, youth climate activist

We’ve found that an effective and engaging way to introduce students to heroism is by teaching the Hero’s Journey, a series of steps that all heroes in literature take. By linking the Hero’s Journey to their personal lives, students internalize how they, just like superheroes, can embark on a heroic quest and similarly ignite positive change in the world.

HIP’s simplified Hero’s Journey and its relevance:

Mundane world: Every hero starts in the “mundane world.” The hero is following the status quo.

This step demonstrates that all heroes start in the same position—the normal world.

Call to adventure: The hero recognizes that there is something that is not right/ needs to be changed.

This step shows students that being a hero is a choice— it is up to the hero to accept the call and do something.

Meeting the Mentor: The hero seeks out a mentor. Mentors share their knowledge and provide the hero with direction and guidance. (Mentors do not have to be a physical person, but can also be inspired from a book, an informational online article, etc.)

This step shows students that heroes can’t achieve their goals on their own. Learning from others and asking for help is a crucial step in changing the world.

Crossing the Threshold: The hero embarks on their adventure.

This is a powerful step as it emphasizes that being a hero stems from action. If the hero decided to do nothing and not cross the threshold, there would be no change and no story.

The Path of Trials: Through the hero’s path of trials, the hero is tested.

This step teaches students to expect the Hero’s Journey to be both challenging and rewarding. They can expect to face struggles, but also to grow and learn along the way.

Return: Once the hero has completed their journey, along with positively impacting the world, they also return as a changed person with new knowledge and perspectives to share with their community.

Hero’s Journey exercise:

“The focus on heroes being those that take action for the good of others through not being a bystander has especially resonated with [10-11 year old students].”

– Rachel Sykes, Educational Psychologist in States of Guernsey

1. Teaching the Hero’s Journey through well-known tales

First introduce the Hero’s Journey through choosing a book or movie familiar to the students.

2.     Connecting the Hero’s Journey to a real-life example

These can be social activists, a hero they saw on TV,  a community member, etc.

3.     Connecting the Hero’s Journey to students’ lives

What is something that they are passionate about that they want to change? How will they accept their call to action and cross the threshold? What are the challenges they may face?

Resources:

  • To connect with the Heroic Imagination Project, find lesson plans, and more, check out the HIP website: https://www.heroicimagination.org/
  • If you are interested in the youth-led, youth-targeted branch of HIP, check out the HIP Hero Club: https://www.hipheroclub.org/
  • Doodles Academy connected with the Heroic Imagination Project when we were creating the curriculum for ‘Heroes Among Us’, a part of our “Outside the Lines” subscription series. You can find that curriculum, and download your own copy, here: https://doodles-academy.org/heroes-among-us/. Use cope HIP at checkout to get it free. 

Zoë Huml

Zoë Huml is a Heroic Imagination Project Board Member and the founder of the HIP Hero Club, the youth-led and youth-targeted branch of HIP. During her gap year before college, Zoë is currently working as a Research Coordinator at Stanford Psychology Department’s Mind & Body Lab while also leading the HIP Hero Club.

Introducing the 2021 ‘Create from the HeART’ contest winners.

Three exceptional student artists share a bit about their life and work.

Meet 5th grade Ella, from Washington.

Where do you live, and what is your favorite part about living there?

I live in Olympia, WA, and I love the mountains, especially Mt Rainier. They are so pretty. We went there one day on one of the hardest hikes by accident.

What is one interesting fact about you?

I went to France and London and saw a bunch of different artworks that inspired me to keep drawing and trying my best.

What makes you happy? Why? 

My friends and family because they support me no matter what.

Where do you create your art (for example, at school, at home, at a community center, etc.) and why is creating art important to you?
I create my artwork at home and at school. Its important to me because sometimes its hard for me to say something or write it down so I draw it.

Winning Artwork:

Indianola

Art Project Used: Persian Miniatures

Students learn about Persian Miniatures. They then create an illustration of a story or poem of their choice using an engraving technique that involved coloring a pattern, painting over it, then carving back in the design.

Artist Statement: “In [the book] “I Can Make This Promise”, Serenity,Roger and Edith are standing on a hill looking at the beach in Indianola.”

About “I Can Make This Promise“: In her debut middle grade novel—inspired by her family’s history—Christine Day tells the story of a girl who uncovers her family’s secrets—and finds her own Native American identity.

What would you like people to know about ‘Indianola’, the artwork that won this contest?

That it’s from a book called “I Can Make This Promise” and they are sitting on the beach looking into the sunset

What part of your artwork are you most proud of? Why?

The people because i never draw people and this is my first time drawing people in that perspective

All the winning artworks are part of 2022 Swag Collection. This collection is ONLY available for a limited time, and is your chance to get a T-shirt, hoodie, mug, or tote featuring the artists and artworks that won our 2022 student art contest! Shop the collection by clicking here

Meet 4th grade Olivia, from Connecticut.

Where do you live, and what is your favorite part about living there?

I live in Connecticut and my favorite part about living here is that we are near everything. Our town has a lot of fun places for activities, there are beaches nearby and we live close to Boston and New York City.

What is one interesting fact about you?
My hair changes to a reddish color in the sun.
What makes you happy? Why? 

My family and my cats Tiger and Lily. Because my family is very loving and my cats are the best.

Where do you create your art and why is creating art important to you? 

I create art at home. And I enjoy creating art cause it’s fun!

Runner Up 1:

Bedtime Story

Art Project Used: A Toy’s Story 

In this project, students draw their favorite toy (or two!) from observation, then use the background to share where their toy goes in their imagination.

Artist Statement:

“My art work is based off my room. The big squishmello is my favorite stuffed animal to sleep with. And the lion that’s also on my bed is crocheted by my mom when I was a baby.”

What part of your artwork are you most proud of? Why?

I am the most proud of the marbled color on the squishmello. And the texture of my favorite snack spilling on my bed.

Meet 5th grade Scarlett, from Ann Arbor.

Where do you live, and what is your favorite part about living there?

I live in Ann Arbor, MI. I like the variety of people here.

What is one interesting fact about you?

I basically self-taught myself on my drawing style

What makes you happy? Why? 

My family and friends make me happy, well they are good people. and help me out.

Where do you create your art and why is creating art important to you?

I create art anywhere, mostly at home. I do doodle at my school, and I love drawing

Runner-Up 2:

Fire Heart

Art Project Used: Superheroes! 

In this project, students develop the backstory for a Superhero, then create a drawing of their superhero in the style of a comic book cover. The details they use should show some aspects of the Superheroes ‘story’.

Artist Statement:

“This girl you see is Quinn, she is 16 years old, And she has magma like powers, she is currently on the top of the building where she lives fighting against her enemy who we can not see, and she is almost falling off the building, She is trying her hardest”

What part of your artwork are you most proud of? Why?

The background. I’m not good with backgrounds.

“The Circle Project”

Students appreciate how belonging to groups and communities enriches their personal identity and illuminate how they fit into these different ‘circles’.

By Kas Patsula, a K-2 grade classroom teacher in Calgary

“The Circle Project” is a grade one/two task that builds community and connection. It is grounded in the wonderful book, ‘The Circles All Around Us’ by Brad Montague. You can view it being read below.

The book states that when we’re first born, our circle is very small, but grows as relationships get built. I was inspired to design this companion weaving project to incorporate social studies, language arts, as well as touching on standards for presentations and sharing.

Connecting to Social Studies through Weaving:

I connected the first part of this project to Social Studies, with a goal of helping students appreciate how belonging to groups and communities enriches their personal identity and illuminating how they fit into different ‘circles’, such as Brownies/Cubs, dance, sports, or music lessons. As a class, we brainstormed all the possible connections we make in the world, beginning with our immediate family and extending outwards. The students eagerly exclaimed, “I take swimming lessons too” as the uncovered novel connections to the classmates as well as how many ties they had to their own community, through this discussion. 

For the next step, I had students select a colour of yarn for each group that they belonged to and create a t-chart. The t-chart was a concrete and visual depiction of their ‘circles’. They then wove a circle, referencing their colors.

Then, each student made a loom out of cardboard and prepared it for weaving by adding a warp (a yarn underlay). They then created a weaving, using the yarn colours that corresponded with the circles they identified on their t-chart. The result was a small circular weaving that told the story of the important relationships that circle the student to the groups that extend into the community.

This project took considerable time, effort and attention to the details of the pattern of over, under in the weaving task.  Plus the tying of all the different colours of yarn was a fine-motor challenge for the students, but they supported each other which added aspects of community-building to this task.  Whenever a colour of yarn changed in the weaving, a new piece of wool had to be tied to the woven piece of yarn. 

Some students could tie knots to affix the two pieces better than others and they became ‘tying ambassadors’ for the entire classroom, generously offering their skills to all their peers.

Adding Poetry and Connecting to Language Arts:

With the weaving complete, we began the Language Arts portion of the project. A narrative can be retold or interpreted visually, and so I had students create a poem to complement their weaving.

Students first matched the yarn colours with watercolour pencil crayons on small paper.

In preparation for the poetry writing, on the back of this paper I had students generate powerful, meaningful words inspired by that colour. We worked as a whole class to model how to generate emotions and powerful words related to a colour of yarn that transitioned to a painted card. After practicing a few colours together, students set off to think about their personal colours, independently. This vocabulary became the foundation of the students’ poetry about the colours found in their weaving emphasizing the three r’s—rhythm, rhyme and repetition.

To evaluate the task, we shared the weaving and poetry at our Parent Interviews. It was a very rich piece of learning as students were able to explain that each piece of yarn holds value artistically but also holds personal meaning for their connections in the world. For example, I asked them to speak to whom each colour represented, or check their t-chart for clarification, should they have forgotten a ‘circles’ name. I also asked them to speak to the group that each colour represented in relation to the circle of important people who supported and surrounded them. They were also able to discuss the difficulties and successes in the task and how they overcame any struggles. Struggles included inability to tie the pieces of yarn, difficulty maintaining the pattern when weaving, being unable to come up with community groups students might belong to being that it is the heart of Covid (we solved this dilemma by stating what have you done in both the past or plan to do in the future)?

My school has not had parents in for over a year. When I sent home this project home prior to interviews, parents reported that students were overflowing with information and so excited to share ALL the work that went into this project (we worked on it for almost two months!!!). Thus for families desperate for their children to share about their day, this ticked all the boxes.

Kas Patsula

Kas Patsula has taught kindergarten, grade one and two in Calgary with a strong literacy and arts focus for over 22 years. She believes that Literacy is the subject that opens the most opportunities to learners; art is the vehicle she uses most to capture students’ interest. She uses art in her teaching whenever possible and believes that art has the power to enhance learning and foster understanding.

Changing the Focus, Making Thinking Visible

How can art help students better understand how they think and process information?

By Dana Squires

Art is not a set of skills. Art is a process-oriented winding path of observation, questioning, and exploration.

This is one reason why incorporating art into other curriculum subjects is so powerful. Art teaches us to see and reflect on ideas in different ways, from different angles and approaches.

When creating art in the classroom, the end product is most often the focus. But as teachers, we forget the learning that happens somewhere on the journey. This learning goes far beyond how to hold a paintbrush or that mixing yellow and blue make green.

By shifting our focus and attention to the brief insightful moments of seeing, critical thinking, and creative problem-solving rather than the finished product, we can reinforce creative thinking, synthesizing and evaluating information, and raise the awareness of the learning that is taking place. Students become thinkers.

Making Thinking Visible in action:

In my classes, one way I focus on making thinking visible is to frame projects in terms of questions to solve rather than an outcome. For example, I often do a self-portrait project at the beginning of the year. The idea is not to have a representational picture, but to give students the opportunity to explore who they are. After we define “self-portrait” – basically a picture of oneself – I give students a variety of fun and brightly colored and printed papers (origami paper is great) and ask them to make a self-portrait by tearing the paper and gluing it on the page.

Since none of the students have green faces, and tearing paper is less than  precise, the question shifts from “What do I look like (and how do I draw that?)” to “How do I make a self-portrait that looks like me using these materials?”

The answer is you can’t.

The question needs to be even broader.

The assignment becomes: Create a self-portrait that shows something about who you are, not what you look like.

It is not about creating a “perfect” portrait or being able to make a realistic drawing.  The question is now “What makes you YOU?” I am always amazed at the insightful things students come up with. And how expressive torn paper can be.

A note about using torn paper rather than drawing/painting or even the use of scissors: Tearing paper removes skill from the equation and levels the playing field for their self expression. Students who “can’t draw” can tear paper along with the best of them and it is not just the “artists” in the room that are successful. With only torn paper and a glue stick the performance anxiety and expectation is low, and that allows real creativity to shine through.

While students work, I move about to encourage and discuss ongoing work. Once students are well into the project I ask each student individually, “What are you thinking about right now?” The simple act of asking what they are thinking midway reminds the student that they are making creative choices and decisions. I take notes and print out and post their quotes with their portraits later. The quotes remind students that there was an active creative process involved and that it remains an important aspect of the piece.

With the portraits posted on the wall, we have a group discussion. Students are asked to notice interesting approaches, things their classmates did that surprised them, and what they can tell about the person in the portrait. It is important to provide an opportunity for students to reflect on visual pieces in front of them and the actual information they convey, as it removes the focus from “Does it look good?” to the thinking behind the pieces.

I also ask about their process – How did the tearing, as opposed to the use of scissors for example, feel and/or change how you approached the project? Students are examining their own process, what challenged or helped them, and how they responded. They gain practice in navigating the ambiguity of open-ended situations and, more importantly, recognizing that they did so successfully.

Reinforcing the creative problem-solving skills in projects, and documenting that process, gives students confidence that thinking and not the “correct” answer is important across the board – in art and elsewhere.

Isn’t that what we all want, students that are thinking?

Dana Squires

Dana Squires has 20 years of experience as an arts integration specialist and teaching artist in Washington State, USA. She has taught in schools at all levels, teaching art, doing collaborative arts integration work, and teacher training. She has worked with refugee organizations, with learners of English as a Second Language, and lived and worked at the village level in both West Africa and Melanesia. Dana studied Making Thinking Visible concepts through The Graduate School of Education at Harvard University.

You can view her work at https://danasquires.com/, and she can be reached at Dana@DanaSquires.com.

Pin It on Pinterest

Share This